Do you have an old piece of furniture in the back of your garage, or a tired chest of drawers that needs a revamp?
If so, we can help turn it into something beautiful, whilst saving you money and being more sustainable!
BEFORE
AFTER
Allison, co-founder of Cream is a lover of up-cycling. When her friend was throwing away some old drawers, she couldn't resist a mini upcycling project and the results are amazing!
Here are 10 simple steps on how to turn a dull piece of furniture into a deluxe statement piece at minimal cost (There are also some tips at the end for the people who would prefer a slightly simpler project!)
.
1. Find the Furniture
Find a piece of furniture that needs a refresh. Maybe it's in the garage, at a charity shop, online or maybe there's a cabinet at home that just needs a little TLC. In Allison's case, she found this tired looking set of wooden drawers.
.
2. Some Light Sanding
.Sand down all of the wood. This doesn't need to be a massive job, just sand enough to take off the first layer.
3. Prepped and Primed.
.Paint a layer of primer and a layer of undercoat onto the sanded wood. The primer is used to create a surface for the paint to adhere to, and you can find this at your local DIY store. You can use any colour of undercoat, preferably use a similar colour, but in this instance Allison used white as that's what she had at home!
.
4. Now for the fun part... painting!


.Paint your piece of furniture in whichever colour you decide. Allison went for our iconic
'Stargazey' emulsion paint; all of our paints are available in sample pots if you would like to test a few colours first.
.
5. Take Your Measurements
.
To gain some idea on how big you would like your design to be, what sort of shape it needs to be and what size to print, measure the furniture or the area that you would like to cover.
6. Choose Your Design And Print Off
.
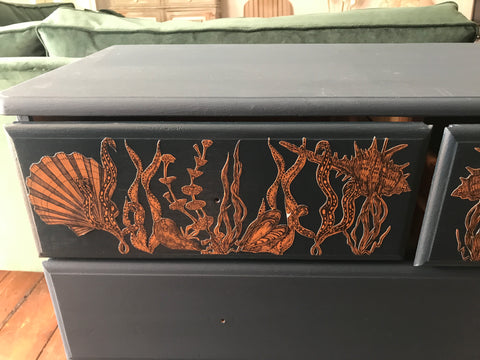
You can use any design you like. Think about whether you're developing a particular theme or whether you just want a single stand out piece. What look are you going for? Allison took elements from our Helford Shell Collection, and coloured them on her computer in a dark blue print over an antique gold background. You can use any print you like and print out on regular printing paper.
.
7. Cut Out Your Printed Designs


Neatly cut out your design. Allison found that using a scalpel was the easiest way to do this. Tip: The simpler the outline shape, the easier it will be to cut out!
.
8. Stick On Your Designs
Glue the print out in place on the furniture using regular PVA glue.
.
9. Add A Coat Of Vanish
.Add a coat of varnish to create a seal over the paper and give the draws that final finish.
10. The Finishing Touch - Add The Perfect Handles
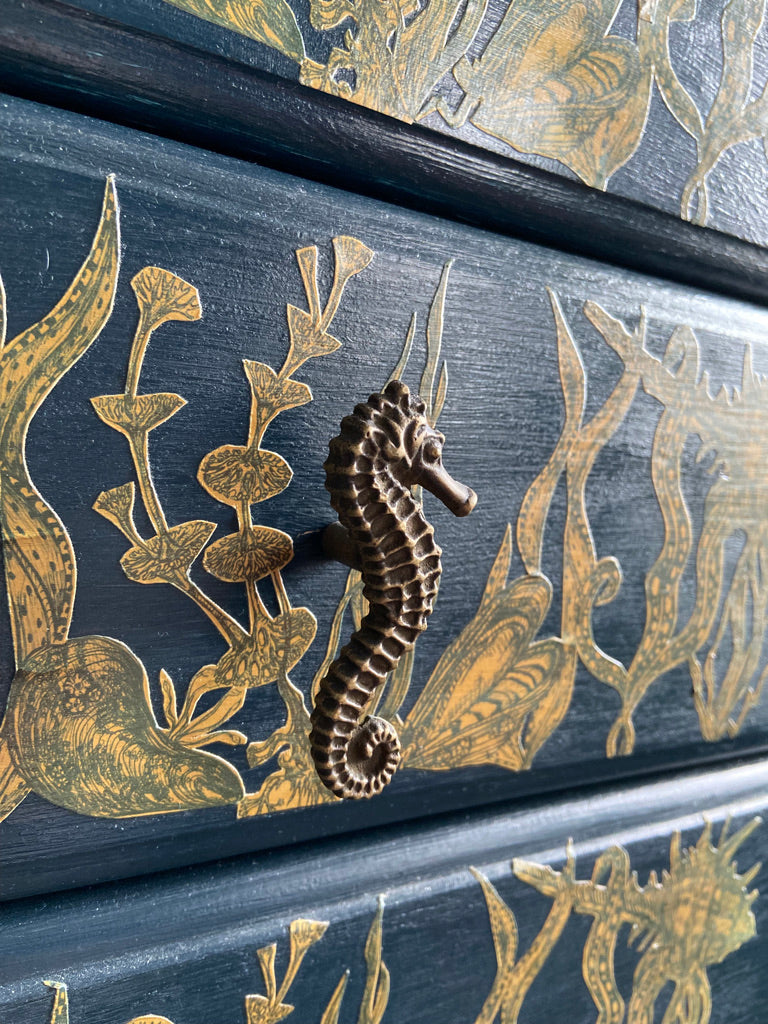
For the perfect finish, add some new handles. Allison used a mix of of two scallop brass knobs for the top set of drawers, and eight of the seahorse brass knobs for the four bottom drawers - both of these are available online and in store. Allison commented, "I wanted to give the drawers an antique feel at a small cost." and added that the handles really helped to pull the look together.
.
.
Here is the final result! How amazing does it look?
.
For a simpler project, Allison suggests giving some furniture a fresh coat of paint and simply adding some new handles.
.
For more inspiration, we have a range of
decorative handles on the website and in store that might help you with your vision.
.
Happy Upcycling!
Rebecca and Allison X


 Neatly cut out your design. Allison found that using a scalpel was the easiest way to do this. Tip: The simpler the outline shape, the easier it will be to cut out!


4 comments
Hello I would like to up cycle a hall table and love the theme how do I source the helford shell images please?
Thank you
Sandy Roberts
Absolutely stunning. The handles are the perfect finishing touch. So well done; wish I had your artistic flair!
Sue Moores
What a fabulous transformation, well done, it’s so inspiring.
June
I love this! I have a boring pine Wellington chest which would lend itself very well to this treatment, and espoecially with the seahorse handles. Wish me luck!
Gill Mannings Cox
Leave a comment
This site is protected by hCaptcha and the hCaptcha Privacy Policy and Terms of Service apply.